Showing posts with label fabric flowers. Show all posts

Monday, June 6, 2011

monday makeoveR>>>DIY Fabric Flower/Ruffle Pillows

For today's Monday Makeover, I'm hoping these ideas uplift & inspire you!!!!

I wanted to show you how my pillow makeover turned out....I love them! A few weeks ago, I got this summer quilt for our bed....LOVE the color combo! grey, tan, white, cream, mustard....so FAB!

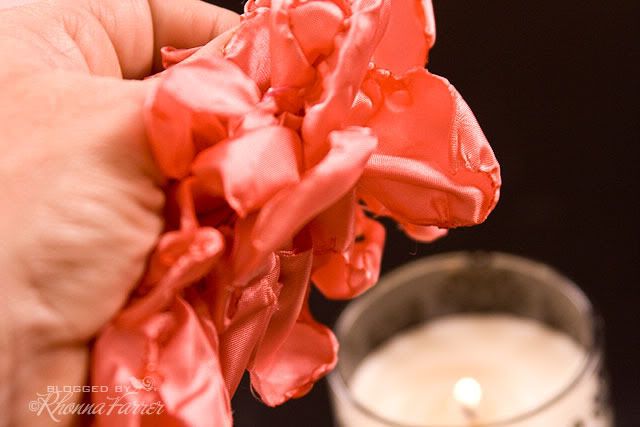
As I showed you HERE, I started doing some no-sew ruffles with the cool fabric glue gun technique! Sew Easy! *giggle*

So, I added those ruffles to the edge of the plain pillow shams I got that went with the quilt...Loved the effect.

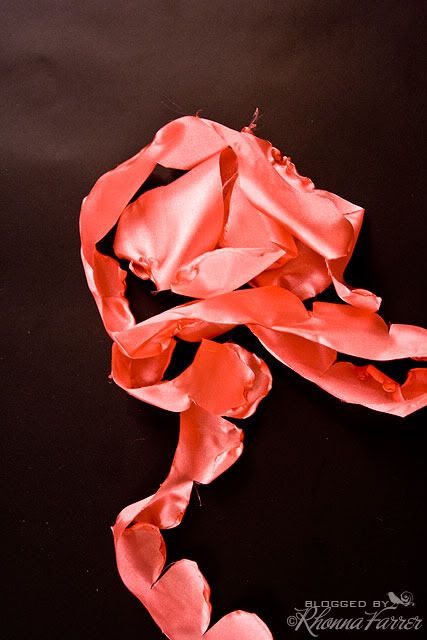
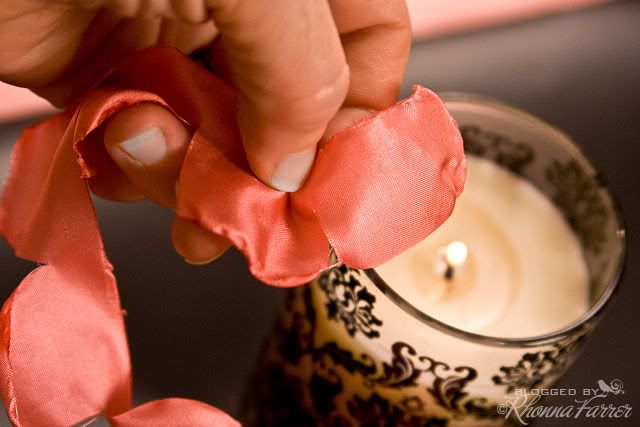
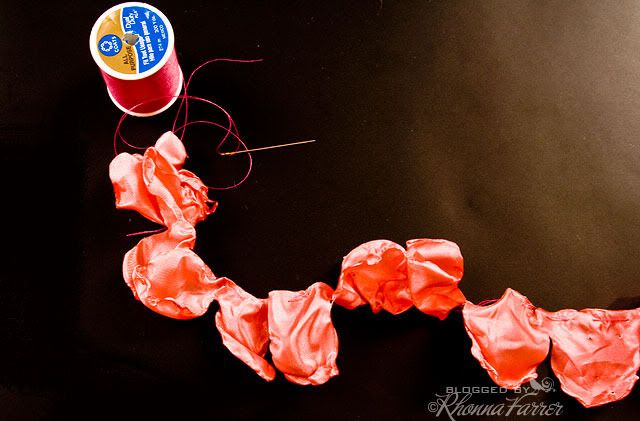
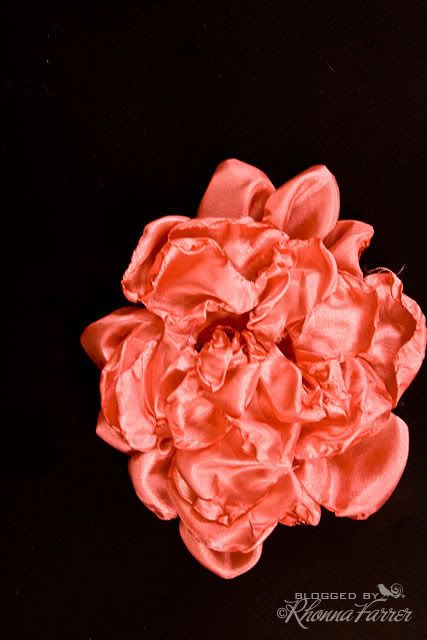
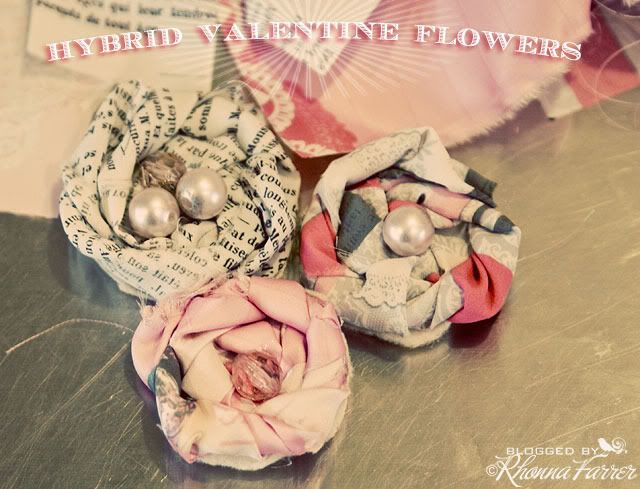
I took the covers off of some square throw pillows I had & hot glued pins on the back of all of these fabric flowers I made using THIS tutorial.  So, I could just pin them into the pillow form...easy. cheap. & I LOVE how it turned out!
Pin ItThen, I grabbed some of my fave grey flowers from the Pink Paislee collection: Parisian Anthology that we did with House of 3....Pinned them on the pillow...& voila! A floral decorative pillow....agian...Easy peasy makeover!

Pin It

The middle pillow is a plain cream pillow I had & I just did the same technique to make the ruffles....& hot glued them on. It's simple & versatile enough, I have a feeling I'll be using this pillow for a long time to come...love it!


** all NO-SEW!** I just used the fabric hot glue gun...my best friend! *grin*


I am in the process of designing & YUDUing a burlap lumbar pillow to top off the whole look..but, I ran out of emulsion & have to burn still burn & yudu the design on the burlap.  So excited how the design turned out...I'll have to show you as soon as I'm done!

So...happy Monday!  It was so fun to makeover the pillows...what are YOU up to today?


Friday, May 20, 2011

fabric flower goodness....

 +photo by Collin Kartchner   frame by me+
Lotsa questions. lotsa questions.


I've had so many people asking about the flower I had in my hair at Liz's birthday party!
*blush blush* thanks, girls!
& the tweet/facebook post about my juxtaposition of raw linen & soft pompom flower I was wearing. 
Pin It


Ok..I can tell you this:
I made it with the same technique that I used HERE in my felt flower tutorial. Scroll down to see the HUGE flower technique.
And HERE for the order form for the tutorial.


I made it with heavy linen, instead of the felt as shown in the tutorial & kit.  I hafta say...it is my fave Spring flower right now...I am wearing it with everything!
I've also made some with burlap & muslin...MMMM...LOVE the raw-ness of them!
I'm wearin' them
in my hair.
on a belt.
with a sweater.
clustered corsages... you know...my favorite flower adornments! *grin*


So...after much asking & requesting, I'm adding an ADD-ON Fabric Flower kit that will include enough materials to create 3 HUGE flowers:
heavy linen
muslin
burlap
pearls
bling
huge clip backs
&
felt circle backers
all to create very fab HUGE flowers to cluster with other sweet treats you have.
I'm so into the raw linen, muslin or burlap juxtaposed with the softness of the singed satin or crepe flowers shown HERE.
ooh la la!

Thursday, January 20, 2011

lots of questions about flowers...

 So...I thought I'll answer them here:

Q: I am DYING over your flowers on the show tonight. Please, Please, PLEASE tell me I can make them myself! I want to be you when I grow up!

A: Ok, you gave me a giggle. 1. Thanks! love that you love the flowers. 2. YES. You can learn. Go HERE to see more info at the very bottom. The blue one I made & had on during the show is a technique I teach you in Tutorial No. 2: Felt Flowers. I teach you how to make 2 different kinds...(actually 3, but using the same techniques). 3. No, you don't want to me when you grow up...I'm only 4'10", so I bet you are already 'grown up'. *wink*


Q: I really want to know how to make the felt flowers. Luv them!!! Is there a tut available for them somehwhere?

A: Thanks! It is so fun to make them and then mist them like I showed on the show! YES. Tutorial  No. 1 is the tut for the felt pom pom flowers. I talk about the kind of felt, show you how to mist, & we even cover other fabrics that work well with the Pom Pom effect! 

Q: I live out in the country & don't get in to purchase a lot of crafting materials. I want to learn how to make your flowers, but don't have access to the materials. Is there any way you'd teach me how AND send me the supplies? I do have basic crafting supplies, but I just want your felt, pearls & all the fun stuff you use! Thank you!

A: I totally get it. To have a kit that you open up with the step out instructions, all the supplies just delivered to your door would be fantastic! So, that's what we're offering now! Just go HERE & scroll down to the bottom where I explain what I'll send you! 

Q: So the flowers are going to be a new release from prima? I think they are so cool and would love to make some.

A: We showed 2 different kinds of flowers on the show: The cool canvas flowers are from Prima, debuting at CHA next week. And the pre-made felt flowers (that we didn't even show) will be in our House of 3 Soiree line with Pink Paislee debuting at CHA, too! 
Q: Can you explain a little more about the 100% felt wool you used when you made that flower on the web show?

A: Just to clarify: the 100% wool felt flower is the one I made & misted. The felt is expensive & hard to find. So: Pink Paislee has made it so fab! We'll be releasing cream & pink PRE-MADE felt flowers that you can Glimmer Mist just like I showed you! *no, it's not 100% wool. But they are so fun!
In fact, be watching for my make & take I'll be doing at CHA. Hint: you'll mist. you'll add the felt flowers. & of course, you'll be able to wear it! *wink*

I think I covered most of the questions...a lot were the same, but there ya go!

Again, to order any of the above, just go HERE.


Thursday, October 21, 2010

DIY Fall Felt Flowers


Ok, this is for my mom...I'd realized I hadn't blogged about these yet & she wanted to see them! I was telling her about a couple of things that were fun about this project.

1. Felt. It has a lovely Autumnal feeling to it & you all know how much I adore flowers to accessorize my outfits.... but..I only had an off white color laying around...
so>
2. Glimmer Mist. I tried it out on my flowers & ya know what? I LOVE the effect it has. Since I started these flowers, I've purchased other felt in colors (like the above heather grey) & some other fabric (the chartreuse I wanted was difficult to achieve with the mist), but isn't it cool to see HOW the Tattered Angels Chalkboard Glimmer Mist works ON the blue rosette? ( I used Peacock on it!)
The Chalkboard Glimmer Mist soaks right into the felt so wonderfully. I love the look...kind of a soft suede look, ya know? Look at how this pink flower turned out...it's the Cotton Candy & it looks so fab! I love it!

A while back one of my Creativity Exercises was getting inspiration online..I had found this pillow at Z Gallerie & could not get it out of my head...and then I had a bunch of birthdays coming up so I got to work & made a ton of gifts! &....a few pillows like this.
They did not cost  $99.95 *wink*.

I love the way they turned out...I started out making clips & brooches..

but, of course, we've worn them in our hair, on our lapels, purses, shoes & even making a Fall Garland out of them! I have so many around here...LOL...we are being overtaken by these little fluffy, cozy flowers!
so, mom...this little DIY photo fest was for you! love you!
& happy Fall....*made some butternut squash soup & roasted cauliflower & it was easy, healthy & delicious!*
now I want to make some pumpkin butter...a tradition for my birthday!

**ETA:  NOw, you can purchase the HOW-TO video & step by step workshop downloads on Rhonna Designs...so, YOU can make these, too!


Friday, May 14, 2010

One moRe DIY Fabric Flower Tutorial

Ok...sorry this took me so long to get up. On the craft show, I showed you a way to create flowers out of a long strip of fabric OR a long strip of ribbon. Here's a little step by step on it!

Supplies needed:
satin poly fabric (OR satin ribbon) *Note: the longer the strip the bigger the flower.
needle & thread OR sewing machine
scissors
hot glue gun OR Fabri-tac
felt circle for backing
clip or pin for back


Step 1: Snip down the entire strip of fabric about 1" apart...as you get to the end, start making wider snips at about 1 1/2". (this will be the outer part of your flower.)  **OPTION: You can use a strip of satin ribbon instead. This is quite fun because of the various widths AND both edges are 'finished' so you don't have to melt the straight edge.
 Step 2: Now, you'll create the petals by holding one section at a time over a flame. Remember: don't get too close to burn it, you just want the heat to singe it.  It will naturally melt into a fabulous petal shape.  **NOTE: If you've used the strip of fabric, melt the straight edge of the strip, too. Just run it along the flame to melt...easy peasy!


Step 3: With a needle & thread, gather until you have a lovely ruffle of petals. **on the webshow, I was saying how cute this would be on a tee shirt!


Step 4: Add a hot glue dot (or Fabric-Tac) in the center of your felt backing circle & press the smaller end of the strip in the middle. Go along the circle in a spiral as you glue & attach the rest of the flower so it ends up looking like this.  **NOTE: When it's all put together, you will notice little raw edges that you may have missed.  Just melt them again.


Step 5 OPTION: If you want to put the flower on a tee shirt or some other fabric, like a belt or something...you can fore go the felt backer & with the needle & thread tack the spiral together as you go along. Then, take the backside of the flower melt it together. With the tacking & the melting, you can then sew the flower to the fabric shirt, headband, belt, sleeves, whatever & it should withstand washing! FUN!


Step 6:  Add jewels, pearls, or any kind of BLING to the center of your flower.
Step 7: Add the clip or the pin on the backing & VOILA! You are good to go....so sassy!

Now, go...have a crafty weekend & PLEASE be sure to SHOW me your flowers. I love seeing your creations!

Friday, April 30, 2010

Let the Sparks FLY!

yup.....its time. Spark registration opens today. sooo excited!

& in celebRation....how about some close ups of the flowers I made the other night on the craftshow.  And, next week,  I'll have step by steps & tips & tricks to go along with the video so you can ramp up for Mother's Day!
Here's a little flower garden to get you excited....happy weekend, happy Spark Registration day, happy May Day, happy National Scrapbooking Day!


Monday, February 8, 2010

Saturday, January 30, 2010

Sneak Peek of House of 3 Valentine projects


(rolled silk fabric flowers made with House of 3 digital kits)
Like we'd mentioned, we'll have lots of fabulously inspiring House of 3 Valentine hybrid projects coming up. Here's a little sneak peek on what I've been up to:

(glittered House of 3 Heart Box with the flowers inside the shadow box.)

(House of 3 Heart Box chunky chandy dangle backed with House of 3 digital art printed out.)


(Valentine Lollies created with House of 3 chipboard, backgrounds, rolled flower & lace!)


Join us next week at the Inspiration House & our own blogs to create some fabulously SWEET Valentine hybrid projects. House of 3 isn't just for digital scrapbooking! *wink*