Friday, January 13, 2012

How Do You Do That? > hybrid Valentine door hanging tutorial


You know me...I LOVE cReating things for my home...& Valentine decorations are one of my faves. So, I combined my NEW Kiss Me collection with vintage  goodness to create this Valentine Door Hanger...here's a little tutorial for this hybrid craft!


Supplies:
1 12" Wilton cake base. (or any cardboard/chipboard/wreath base)
70-80 strips of vintage book/music/dictionary pages 
15-20 strips of Kiss Me Papers (printed out & cut)
hot glue gun & sticks
10 kraft coffee filters
5-8 vintage book/map/dictionary/music papers cut into flower petals
stuff for junque ribbon: burlap, twine, fabric ribbons


Steps:
1. Starting on the outside of the base, take one strip of vintage music paper & hot glue in half, then hot glue onto the base. Continue this all around the outer edge of the entire base.
2. Continue, working your way in...I created 2 layers, but you may want more, just see how it looks.
3. Take your Kiss Me strips & create a 3rd layer...making sure you glue toward the inner part of the circle.
4. Create another circle of Kraft/brown coffee filters. Simply fold in half & scrunch. Glue around in circle.
For more of an idea of how to do this, check out this video here. or HERE.


5. Create a paper flower. I followed this tutorial, but made it my own by cutting the petals into different shapes.  NOTE: when you curl the petals, be very careful, as each vintage paper is very different. Some are very fragile & rip easily. When choosing vintage books to purchase, feel the paper & see how it will work...you don't want it so crispy that it breaks or rips when you manipulate it.


6. Create the inside fringe flower by following this tutorial on my blog here.
Glue it all inside & voila! Your huuuge flower is done! Mine ended up being about 24" in diameter. LOVE it!
7. Spray a coat of gold glimmer all over the flower. Be careful not to spray too close to make it too wet. Just a light mist will give it a super elegant glimmer. 
8. Add a junque ribbon on top by tying a bunch of ribbon, tulle, burlap...whatever you want!

Now, think: lollies on a stick, hanging in windows, smaller versions as wreaths, garlands, chandeliers..yea...I'm going crazy cReating & having fun! 
Simple. Easy. Seriously, this whole thing took me about 45 min. to make...& I LOVE it! Enjoy your Valentine hybrid crafting! ....
and don't forget you can enter to WIN the Valentine perfume until Feb. 6, twenty.12.

Thursday, January 12, 2012

Kiss Me & a Valentine Giveaway!

So excited for this collection: Kiss Me! Perfect for all your Valentine crafts, scrapbooking, cards, photos, blogging, home décor & parties!
We released it last night & already we are blown away with the response! Thank you!!! Love it!
Aaaannnddd....those of you that receive the Newsletter heard about the fun Valentine Giveaway, right?

We wanted to spRead the LOVE this Valentine season by giving away 2 bottles of my very fave perfum: Lollia's No. 19 Breathe! I first fell in LOVE with it when I visited Dear Lizzie...I couldn't get it out of my mind...then, I bought it & it's my 'happy place'! Just a spritz of it & .....*sigh* bReathe!

So, as the instructions said, here's how to win:

Leave a comment here,  on the BREATHE GIVEAWAY blogpost,  from January 12th to February 6th. Then on February 7th we will randomly pick 2 winners and send them each ONE 3.5 oz. bottle of Lollia's No. 19 Breathe Eau de Parfum!
We'll make sure to send it to your home in time for your own Valentine's celebration!*

*Due to shipping, winners outside of the United States will not receive the prize before February 14th.

Fun, huh? Seriously....i LOVE Valentine's Day & season...the hearts, flowers, chocolates....but, since I can't eat the chocolate, I love thinking of 'non-fattening' ways to celebRate the season....& delish perfum is IT! Not to mention a great way to say: Kiss Me....good luck!

Ok, so now, I wanted to take you in a bit with the Kiss Me Collection.  I am in LOVE with it! & designed it with colors, textures, looks & feels that juxtapose romantic vintage with a modern twist...i love doing that. At our house, we call it: Mintage! LOL!
The whole collection comes with so many things: (& for right now, you can get it all bundled up or separate)


Valentines (includes tons of washi tape, printables & individual Valentines- pre-designed)

Brushes (lovely designs to add some LOVE to all of your projects)

Borders (I am in LOVE with those cute Love Birds w/ top hats...oo la la!)

Pieces (designed with YOU in mind as the designer...just piece together & you've got LOVEly art)
Papers (printable backgrounds in 12x12 & 8x10...mixture of vintage & modern: Mintage)

Printables kit (includes a Be Mine banner, Tags & Flags & Circles & borders...everything you need for a party)

Facebook Cover Pages (perfect for a pre-designed, FAST & easy way to add some LOVE to your Facebook Timeline wall!)

aannndd: Word Art! LOVE these so much! Add them to any of the papers for a super fast scrapbook page or card. oooh la la!


So...I realize the colors are not 'traditional'....(I'm not very traditional when it comes to my designing. *wink*) But, if you are & you love the designs, but want different colors...this is when digital files are SO fab! Remember the handy dandy re-coloring tricks I taught you HERE?  Well...that same technique can be used on your Kiss Me collection, too! From the light rose color original....to THIS! brighter pinks!

To simply Re-color, you'd go into Photoshop & go to: IMAGE>ADJUSTMENTS>HUE/SATURATION & your window would pop up like this. Simply adjust the sliders until you get the color you want. Remember to fiddle with the Huge, Saturation AND Lightness to achieve very cool colors.

And this heart paper is so fab in its original design of kraft & blush, but if you want a different look...try this one:

Or...how about an even softer look?  See? Same papers, but totally different looks! Love it!
Now...I wanted to show you another way to re-color called: Replace Color.  It works a different way, in that you select ONE color & replace it. & only it. So...for the striped paper, if the rose color wasn't doing it for you & you wanted it red: go to: IMAGE>ADJUSTMENTS>REPLACE COLOR
This box will pop up:
Then,  you will take your 'eye dropper' & select the color you want to change. Since this particular paper has solid striped & textured background, it works perfectly to recolor JUST the stripes & keep the vintage texture in the background. I just adjusted my sliders to get a red & voila! The paper is YOUR fave color scheme!

So....enjoy, enjoy this fabulously LOVEly season...& leave a comment to WIN the scrumptious perfume...


Tuesday, January 10, 2012

cReative team tuesday: A Year To Follow Your Heart

We are 10 days into twenty.12. How are you feeling? How are you doing on your New Years' Resolutions? I am happy to say..I feel GREAT! And, I must say...I owe it all to 'A Year To Follow Your Heart' digital kits....they are seriously helping me stay on track every day.
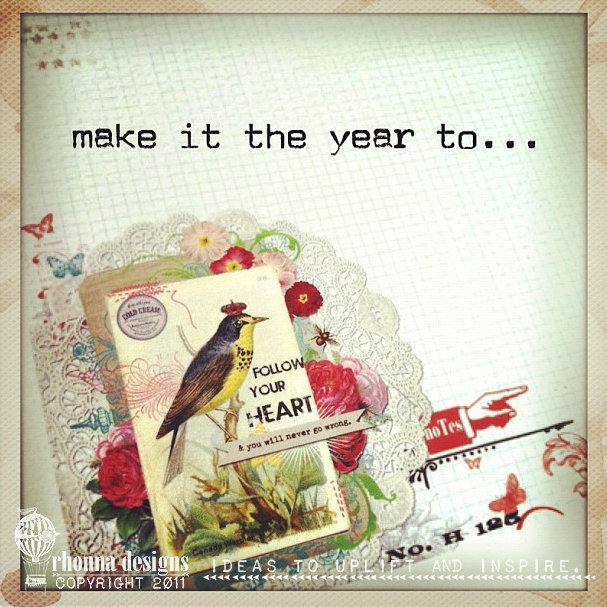
Each of us has our own way of 'getting it done'....& MyBook Planner has helped me.  
I am loving each page . each day. each way to stay accountable for my progress.

I absolutely LOVE what my cReative Team member, Melissa, has done with these kits!
Check out her blog where she tells us how SHE used these kits to stay on target with her scrapbooking, Project Life & her thoughts on these projects! 
Love how she used each of the pages as GOAL pages. simply brilliant!
& the idea of using the calendars along with the Journaling Cards is sooo fab. I just LOVE it!
slipped into page protectors...love.
And her idea of having the calendar to document important days in her monthly scrapbooking...I just might need to take that inspiration & run with it! Sooo fabulous!


So...I am soo excited to share the NEW Valentine's collections on Rhonna Designs this week...We are gearing up with digital & printable kits...AND a really fun giveaway for Valentine's day...
think: flowers. hearts. chocolate. perfume. *wink* It is one of my fave holidays...I just LOVE it!
stay tuned...until then...


Thursday, January 5, 2012

New collection: Follow Your Heart with My Mind's Eye

I'm thrilled to be able to share this with you now!  
Introducing,

This collection will be unveiled at CHA (the Craft & Hobby Trade Show) in a few weeks. If you are familiar with My Mind's Eye...their quality, color & goodness just shines through. I couldn't be happier to collaborate with them on this! 

So, as I mentioned yesterday in this post, the whole 'Follow Your Heart' concept came from my heart...healing art. And, the whole idea of following your heart through twenty.12 is something I am seeking everyday this year. I'm determined to listen to my heart and then follow it! 

And now, crafters can have the touchy-feely part of this collection! Holla!

The collection includes 2 different color schemes: "be amazing" is teal, yellow, kraft, grey, with a little splash of tangerine tango juxtaposed with vintage ephemera. 


"be happy" is aqua, champagne, ballet pink, kraft & yellow mixed with vintage music papers!  Love the 12 double sided papers in each color scheme.  


Each color scheme includes: clear stamps, twine, chipboard stickers, buttons, brads, bling gems, clear transparent frames, cool paper clips & layered stickers!   


aaaand....the papers come in the cute 6x6 paper pads...mmmmm! deeelish!

Of course, the digital & printable add-ons will always be available Rhonna Designs. store...you bet I'll be designing more add-ons that will compliment the actual physical collection! I have them drafted up already! Sooo excited!


Wednesday, January 4, 2012

a closer look at 'A Year To Follow Your Heart' 2012 Calendar & Printables


This is my mantra for this year.  
Follow Your Heart.
I learned so much last year, and have a feeling this year will be even better!  You'll be seeing a lot of 'Follow Your Heart' soon. *wink*

But, I wanted to give you a bit of the background of this whole collection.
( a little personal here, so if that bothers, you...well. you've been warned.)

Last year, I was going through a very difficult time with my health. I knew it was time for me to make a lot of changes, even though that broke my heart...and step back from everything I was doing.
I also knew that I'd made choices that were making me work way too hard & was taking a toll on my health & family. I was losing steam. creative, physical, emotional...I had to change.
So...I really had to reflect.
In the Spring, I started to get a bit better as I focused on my health...I came up with the 6 Week Shape Up challenge on my blog & each week I created these bits of art that were healing me. Art is therapy. This is so true.
So, each bit of 'Follow My Heart' is a bit of healing art..it is my heart. 

So, I LOVE these new kits They mean a lot to me. I've been printing out & creating MyBook Planner/journal with the 'A Year To Follow Your Heart' Printable kit & loving the book I'm creating!
It's a work in progress...just as this whole year will be. But, I've come up with my first 6 Week Shape Up!
I've got 6 weeks until our anniversary...& I'm pumped & ready to rock & roll!

So, the amazing thing about this kit is that it's filled with all sorts of digital and printable files that you can use to uplift & inspire you all through the year!

This is my cover. I printed out the 'Follow Your Heart' page & then wrote my vision of what I want this year.
Inside, I printed out all of the 6x8 pages & put them in the sleeves of the journal/planner. Here, I can write each day how my goals are going, etc.  So, I'm using it more like a journal than a planner...but, I love it!
The 6 week shape up pages are PERFECT for me right now. Each of these pages is stapled on each week of the specified 6 weeks. fab, no? 
Aand, don't forget the tiny little journaling cards. perfectly delish. & so cute to have in this planner. I love them!
The 21 Challenge pages are geared towards prompting you through a challenge of your own...When you put them in the planner, you can use them for the days you need. I love it.

Ideally, you'd do the 21 Challenge first...those 3 weeks create your habit. THEN, you'd use the 6 week shape up pages & prompts. to build on what you learned & did in the 21 Challenge.  I did it a bit different since my time frame is exactly 6 weeks!
The Calendar is scrumptious, too! Each month is designed in a 6x6 format. You can print them out & put magnets on them, or bind them, or print out the PDF Printables that are mini-callies! 4x4! So cute!
And, each month has art & quotes that will uplift & inspire you!

so....I always LOVE to see what you've done with Rhonna Designs! Look What Laura did with the Monogram Junque kit! soo cute for Valentine's day! I adore it!!! Thanks so much, Laura...you are amazing! Check out her blog! and the tutorial HERE. 


 Speaking of....I'm almost ready to release Valentine 2012 kits...I'm giddy! So, be watching for that...
AND...something I've been keeping under wraps for a while is finally here...I can spill the beans tomorrow...so come on over! 
until then...