Thursday, May 27, 2010

let the magic act begin....

....the disappearing act, if you will.  Summer Vacation starts in just a few days, & although school is not out officially, I've been busy with the kids' 'festivities' every. single. day. for the past 2 weeks! LOL...hence my MIA status on the blog.


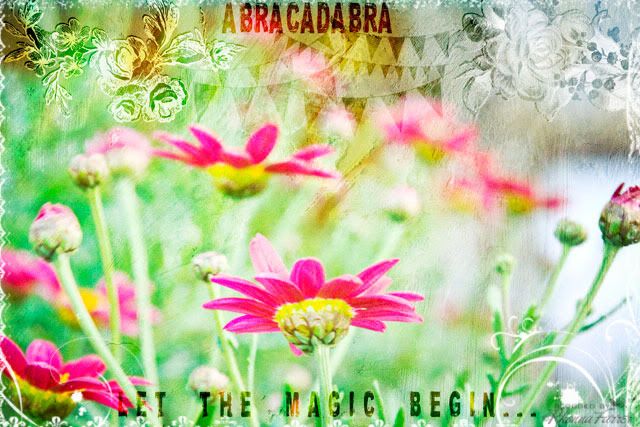
but now.....the real magic act begins....the magic of Motherhood during the Summer...& trying to keep it real during the vacation

Don't get me wrong:
I love sleeping in.
I love being with my kids all day long.
I love the sun & summer & swimming & being outdoors 'til 10pm to see the sunset.
I love adventures. 
I love making memories with each other.
I love spontaneous trips...& planned trips.
I love 'cousin swapping' & having FUN with my nieces & nephews.
I love hiking in the gorgeous Utah mountains.
I love girls' camp. I love Scout camp.
I love Lake Powell & the houseboat!
I love river trips.
I love camping.
I love being with my gorgeous, loving, fantastic husband....


but....wow. I'm exhausted already!  How can I do this magic act of being a loving Mother during Summer Vacation????

I've done a lot of soul searching & planning & revisiting summer plans from years gone by....

And I set some big goals.

For myself. & for our family.
 Myself:  I set some big goals at the beginning of the year in my Simply Amazing book! And one of the first is ...my half marathon. um...yea. I'll let you know how it goes!

Family:  I have all my new schedules all typed out, printed, put in individual books & ready to roll! Our first adventure starts the *minute* school gets out. Literally. We are headed for some FUN & our Summer starts off with a *bang*. I'll tweet & post on my facebook as the journey unfolds.
I'm pretty excited about our little 'summer books' I've created for each of us...I think this will be the key to our success as we let the Summer Magic begin....


What's on your list? And how has you planned your summer? Can't wait to hear....it'll be *magical* I'm sure!

Tuesday, May 25, 2010

Join us please....

for a fantastically FUN time on our Pink Paislee & House of 3 Webshow!  Wednesday, 7PM MDT, HERE!

For some fun stuff, check out Heidi's & Janet's blogs! Can't wait...its' always so fab to get together with you all over the world!

Wednesday, May 19, 2010

Bada BLING!

So, if you missed the webshow last night...you catch it HERE. So much fun *blingin* it up! (& check HERE for more info on what we showed you!)

and....
don't forget, locals: Tonight is my Dear Lizzie class! There are a few spots left! Can't wait to create & talk 'digital brushes' with you....See you then!

Friday, May 14, 2010

One moRe DIY Fabric Flower Tutorial

Ok...sorry this took me so long to get up. On the craft show, I showed you a way to create flowers out of a long strip of fabric OR a long strip of ribbon. Here's a little step by step on it!

Supplies needed:
satin poly fabric (OR satin ribbon) *Note: the longer the strip the bigger the flower.
needle & thread OR sewing machine
scissors
hot glue gun OR Fabri-tac
felt circle for backing
clip or pin for back


Step 1: Snip down the entire strip of fabric about 1" apart...as you get to the end, start making wider snips at about 1 1/2". (this will be the outer part of your flower.)  **OPTION: You can use a strip of satin ribbon instead. This is quite fun because of the various widths AND both edges are 'finished' so you don't have to melt the straight edge.
 Step 2: Now, you'll create the petals by holding one section at a time over a flame. Remember: don't get too close to burn it, you just want the heat to singe it.  It will naturally melt into a fabulous petal shape.  **NOTE: If you've used the strip of fabric, melt the straight edge of the strip, too. Just run it along the flame to melt...easy peasy!


Step 3: With a needle & thread, gather until you have a lovely ruffle of petals. **on the webshow, I was saying how cute this would be on a tee shirt!


Step 4: Add a hot glue dot (or Fabric-Tac) in the center of your felt backing circle & press the smaller end of the strip in the middle. Go along the circle in a spiral as you glue & attach the rest of the flower so it ends up looking like this.  **NOTE: When it's all put together, you will notice little raw edges that you may have missed.  Just melt them again.


Step 5 OPTION: If you want to put the flower on a tee shirt or some other fabric, like a belt or something...you can fore go the felt backer & with the needle & thread tack the spiral together as you go along. Then, take the backside of the flower melt it together. With the tacking & the melting, you can then sew the flower to the fabric shirt, headband, belt, sleeves, whatever & it should withstand washing! FUN!


Step 6:  Add jewels, pearls, or any kind of BLING to the center of your flower.
Step 7: Add the clip or the pin on the backing & VOILA! You are good to go....so sassy!

Now, go...have a crafty weekend & PLEASE be sure to SHOW me your flowers. I love seeing your creations!

Thursday, May 13, 2010

Pink Paislee & House of 3...save the date!

We mentioned this last night on the webshow, but....ch*ch*checkity check:
 We can't wait to share our projects with you & show you the House of 3 tie in kit, too! Be sure to order it NOW so you can have the goodies by the webshow!  Don't miss it...circle your calendar & we'll see you then!

Wednesday, May 12, 2010

tonight!


House of 3 LIVE show tonight with Heidi. Father's Day ideas anyone? You won't want to miss this one...& the freebie is soo fab!  Remember: you get the freebie when you are at the chat...after that we'll be putting them in our store for .99. Still, a great deal, but you'll want to be there at the chat! :) See you tonight!

Monday, May 10, 2010

The beauty of being a woman....


I hope everyone had a wonderfully delicious day yesterday! Happy Mother's Day to ALL women!!!!
My sweet kids & gorgeous husband spoiled me, pampered me...showered me with love notes & goodness. I got to talk to my own, wonderful Mother & we spent it with my amazing Mother in Law & Sisters in Law...all such great women & mothers. *I missed my own sisters & SIL on the other side of my family, but love them just as much!

It just made me reflect on what a powerfully amazing thing being a woman really is!  I just love it!  Great start to a new week!

Friday, May 7, 2010

Local Digital Design class:: at Dear Lizzie!

This is the last of the Winter Workshops over at Dear Lizzie & I'll be doing 1 last hoorah on May 20! This is the Digital Design class that I've done before,  but many of you weren't able to make it! 

Let's Brush Up Digital Design Class with Rhonna Farrer
Thursday, May 20, from 7:30-9:30 p.m.

Skill Level: Intermediate Beginners & Up

Have you ever wondered how to add those swirls or images to photos? Or on your blog? Holiday cards?
Create something like this in a snap!
Join Rhonna as she teaches you how to load, use, size, color, create, save, rotate & space digital brushes in Photoshop CS4! And you'll be able to create a little magic for your own personal use.
The class is designed on an Intermediate Beginner Level where you will see Rhonna demonstrate & teach Brush Techniques on a large screen. No need to bring your laptops. Just sit back, relax, enjoy signature Dear Lizzie treats & learn NEW design techniques!

Class will
include an exclusive CD with 100 versatile & amazing brushes, a printed guide & step by step instructions so you can go home & practice the new techniques.

Cost: $35
{Huge Brush Kit CD included}


Register by calling:  801.492.0022


Wednesday, May 5, 2010

SALE!


um...yea! 25% off of all our Featured Kits! Check out the House Inspiration Blog for some ideas & inspiration! and....for those of you that missed out on the Celebration Flag Free Download from the craftshow last week...you can get it now! woot!

& check out Janet's blog...she answers questions about the Design House Projects and is doing a GIVEAWAY!! You can win one of the Design House Projects! FAB!

And be sure to look at the NEW House of 3 Silhouette Grad stuff in their store! mmm!

Monday, May 3, 2010

DIY Fabric Flowers for Mother's Day or any day!


  Seriously, I'm in LOVE with these flowers. You can make them any size, color, add any kind of bling or pearls/buttons/beads/findings to the center of them & they sass up ANY outfit!

Here's a little looksie at how to make these puppies.  
Supplies needed:
  1. 1/2 yard of any kind of synthetic (like polyester) fabric. I love satin, chiffon or organza for these flowers.
  2. candle. tea light. lighter. whatever you've got around.
  3. scissors
  4. circle template I used on the show. found HERE.
  5. felt cut into a circle to back the flower
  6. pins, clips, hair pins, bobby pins; anything to attach your flower to something.
optional: lil' lovelies to put in the middle of your flowers.
 Steps:
 
1.  Print & cut out on thick cardstock the Circle Template found HERE.  Cut out fabric in the various sized circles. Remember: the more layers you have, the fuller your flower.

2. Snip on the dotted line to create the  petals.  Note:  Depending on the fabric, you may want to snip little notches off the corners of your petals. Some fabrics will be fine & will melt in a very natural looking petal. But, some fabrics don't like that extra bit o' mass there & will burn & get all wonky.

3. Fold over to expose 1 petal at a time & with tweezers, (or if you're really brave; your fingers) melt about 1 inch away from flame. NOT too close or you'll burn it!  But, watch out: each fabric will melt differently. i.e. organza & chiffon melt VERY fast.
 

4. Layer from large to small & glue or stitch each layer to one another until you have a fabulously gorgeous flower. 

**You can  layer various colors or textures like organza & chiffon with the silk for a very cool effect.

5. Add the smashing *bling*  to the center of you flower.

 
6. Cut out a felt circle & adhere to the back of your flower.
7. Add a pin, clip or any other 'attachment' for your flower.
mmmm....it's a beauty!