Showing posts with label FAQs. Show all posts

Monday, July 13, 2009

Mo Q & A>>>flipping brushes

Q: Diane said...

How do you flip a brush? Like your botanical swirl brushes, I would like one on one side of my document and then flip it over to go on the other side of the documents. Appreciate any help. Just downloaded 7 of your digi files and having a blast. Plan on using the "July 4" on little bags of cookies to sell at our carnival this weekend (Would that be alright?)It is for a school fundraiser. Love your work!

A: Rhonna said:
#1. How cool is THAT to use the July 4 kit for bags of cookies! WTG! Yes, if you purchase a kit with a Personal License, then you can use them for any
personal use that is for non-profit. This fundraiser sounds great. Of course, any time there is the opportunity for you to link or share where you got the art, we'd love it! Thanks

#2. Brushes. Yes...you
can flip brushes, but it all depends on your program. The newer versions of Photoshop & Photoshop Elements allows you to go into a Brush Tab & flip, space, rotate, etc! But, older versions of the programs don't have this handy dandy palette. One HUGE reason to keep updated on your versions of software...they make life easier!

Ok, so on to the little tutorial on how to flip your brushes!
1. Go to: Window>Brushes. This will bring up a Brush Palette that looks like this:
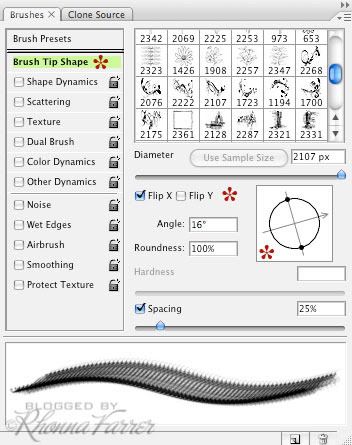
Note: I keep my Brush Tab docked just because I use them all the time!

2. By
Default it may look different than above, so make sure you have to click on Brush Tip Shape to see this window. (Make sure all other categories are un-checked, too.)
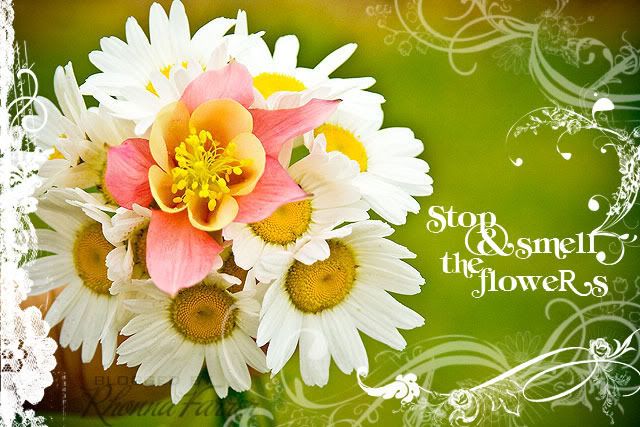
  • Flip: Notice the Flip X & Flip Y boxes. This is where you will flip your brush Axis. So helpful. & so fun! The top image of the flowers was done with the House of 3 Rhonna Botanical Swirls & I flipped the axis until I liked it. But, I also wanted to rotate the brush a bit.
  • Rotate: Notice the circle with the arrow & dots. You can rotate your brush with your mouse by clickin on that arrow & simply turning/rotating it how you want it. OR you can go directly into the box at the left that says Angle & type in the degrees.
  • Spacing: Notice the Spacing box. This is the place to space your brushes. So, say you want an evenly spaced dotted line. This is where you'd do it. Simply select a round brush, go into this Brush Tab & adjust the Spacing slider until you get the desired effect. **TIP: To get a straight dotted line, hold down your Shift Key while dragging your round, spaced brush.
  • Diameter: This is also a great place to adjust the diameter (size) of your brush on the Diameter slider. **TIP: a short cut to make your brushes smaller is: With your brush selected, hit your [ key & to get your brushes bigger, hit your ] key.
Ok, hope that answers your questions on the flipping of the brush!
enjoy!
R

Wednesday, July 8, 2009

Q & A: **digital bRushes**

First of all. I love digital brushes. I remember the first time I discovered them. It was about 6 years ago & I stayed up all night. playing. with my jaw on the floor.
i
couldn't
stop.

6 years later & I have learned a ton about brushes. I use them every day. I make them. I share them. I save them. I download them. I am a brush addict!
so...
Today's Q & A is about brushes.
...this time it's a question from an email:
Stacy asked:
I love your Rhonna Designs brushes! I have Photoshop 7 & so  your brushes don't work. I hate to miss out. Is there anything I can do?

Good news, Stacy! YES>>>>you can still use my Rhonna Designs brushes! You will just need to open up the PNG files & create your own brushes. Then, you can use them just as she shows you in the class!


1. Open your PNG image to create your brush.
2. Go to SELECT>ALL.
3. Go to EDIT>DEFINE BRUSH. Name your brush when the box prompts you.
Voila! You've created a brush!

**This doesn’t mean your brush is saved. You may still lose it unless you save it.

Saving Brushes:
1. Select your Brush Palette. Notice the arrow.

Select the arrow & you will see the drop down menu.

2. Here, you will see where you can Reset, Load, Save, & Replace your brushes.

Hit Save & you’ve saved your brush.

There’s tons more to the world of brushes, but this is a start.
**for another little video tutorial; check out this!


&...speaking of brushes...one of my daily blog stops, Besottedgave a shout out HERE!
I love her brushes & love that she has the 'i'm very NICE' badge on her blog. She is. Very nice. She said some very kind things HERE!
So...the above image is one of her free flourish brushes along with some of mine. See how many cool, wonderfully fabulously scrumptious things you can do with brushes?
It will blow.
your.
mind!
enjoy!
R

Tuesday, July 7, 2009

Tuesday Q & A::Frames

First question comes from Jen...
Blogger
Q: jen said...

Yes! First! Alright first, you are just too darn creative! That july kit is justLink amazing!
Secondly my question is: When you post pictures on your blog, you have great framing overlays for them. Are you creating them from scratch, getting them from Hof3, etc? Details! :D Especially the one on "Monday's goodness" post. Thanks!

A: rhonna said...
Most of my blog frames already exist...I use House of 3 frames! Here are some of my faves:
Negatives Kit.
Rounded Corners Kit.
Rounded White Corner Kit
Ornate Frames Kit
Round in Circles Frame Kit
House of 3 Frames Kit
& if I don't want a full frame border...these House Edges are so fab. I like to stamp just 1 or 2 sides for added interest!

But, the one I used for Monday's Goodness was created from scratch. Meaning..I simply used a bunch of brushes I have created & pieced them together.
Details: It's a lot faster to use the pre-made frames & very rarely do I make them from scratch! When they are brushes, simply refer to this tutorial for guidance. When you have colored or black PNG files, go here!
More help:
Here's a tutorial on how to use the Rounded Corners Kit!
>>>>Tips on Brushes.
more answers to come....
R

Tuesday, June 30, 2009

tuesday happenings>>>1,2,3

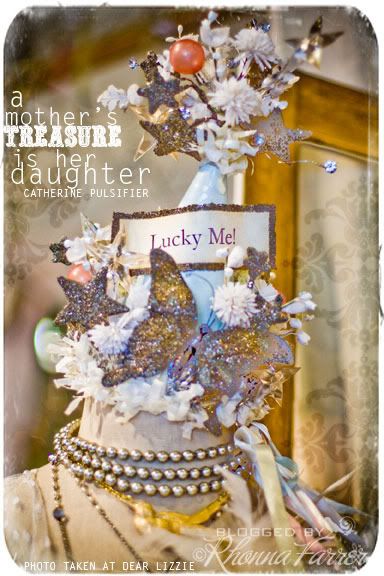
(photo taken at dear lizzie; hat for sale there!)
1. special day
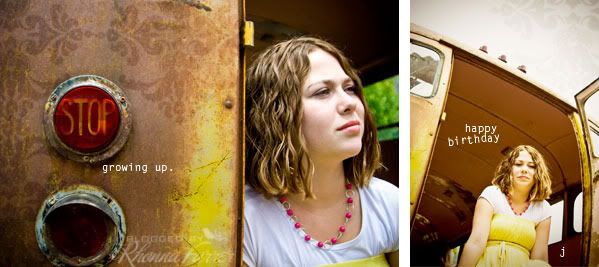
in our house:::: J's birthday is today. She's growing up so fast, it kind of freaks me out. But, she's so wonderful & I do enjoy seeing her learn, grow & become an amazing person! I love you, Iri!
2. fun stuff over at House of 3's Inspiration House! New printable kit. 6 pages to print out. sparkler tags, bottle wraps, peanut labels...& stuff for this cute garland! love it! AND..steps on the sparklers, garland & even popcorn bags! Go check it out here>>>>and.
3. FAQs. I think it's time to have another one of these. I'll open it up for questions. If you've emailed me some questions lately, sorry I didn't get back to you. I've been swamped & thought it would be good to have the questions here so I can answer them & all can see. no waiting for my email! LOL!
have a fab day..I'm going to play all day with my kids!
R

Saturday, June 13, 2009

bRushes:: digital stamps


The world of digital brushes will change your life. Really!
They are amazing.
Rhonna Designs of digital brushes in our Digital Section. 
**note: Not all kits will have the ABR brush files in them, so be sure to read the kit description carefully!**
There’s also a lot of to learn about them.
I don’t overwhelm you, so I’ll start out with the FAQs I’ve been asked many times:
Q: “I downloaded a brush kit & it has both .abr files & .png files?
What’s the difference?”
A: .ABR files are the actual brushes. Adobe Photoshop (PS) & Photoshop Elements (PSE) can support .ABR files. You load them in PS or PSE (more on that later). You can change colors in the Color Box, rotate, space, etc. all in the Brushes Palette.
Not all programs can support the actual .ABR files, so, over at Rhonna Designs, I offer the image sets as .PNG files. 
.PNG files can be dragged & dropped over something because they retain their transparent qualities. You can re-color them, too.(another tutorial will follow on that info)  You can not load them as .ABR files, so don’t try it!
But, you can create your own brushes. I.e. You can create your own brushes in older versions of PS or PSE and in Paintshop Pro (PSP), you can create a ‘stamp’ out of the .PNG files.
Notice: If you load the .ABR files, & they say ‘not compatible’, it is because the brushes were created in a newer version of PS and most likely, you are using an older version of PS or PSE. So, you would just need to open up your .PNG files & create your own brushes.(more on that later)
Note: PNG files can work with any program that will support & open PNG files. (word processing programs, photo editing programs, etc.)  Rhonna Designs ABR brush files are ONLY compatible with PSE7+ & PSCS5+. Not compatible with older versions of PSE & PS, hence, the PNG files so you can make your own brushes out of the PNG files.

 Q: "I still don’t get it. What are brushes?"
A: Think of the brushes as stamps. You 'dip' your brush/stamp into a color & then brush/stamp/click it onto your digital canvas. All brushes are different designs...some of my brush creations are borders, frames, swirls, alphabets, designs, pictures, shapes, words, etc. 


Q: “How do I load my brushes?”
A:  Once you’ve downloaded & unzipped your kit, double click/right click on your ABR brush file & voila! they appear in your Brush Palette at the bottom!
If that doesn’t work:
Select the brush tool on your toolbar in PS or PSE.
Select the arrow on the drop-down Brushes Menu and then select LOAD BRUSHES.
Find your downloaded ABR brush file, then click LOAD.
The new brushes will appear at the bottom of your Brush Palette.

Q: "How can I change colors? "
A: If  you have the ABR brush file loaded, you can simply click on the color box & change the color of your brush/stamp. 
If you are using the PNG files, there are various ways to change color.  For a black PNG file, you’ll need to change the black PNG file to a Layer Style/color overlay & you can choose any color you want!
In PS to create a Layer Style:
1. Open your PNG file.
2. Go to LAYER>LAYER STYLE>>COLOR OVERLAY.
Select the Color desired.
Note:This method will give a flat color. You will lose all texture or patterns, unless you use the Light Modes to Blend the color.


Q: "What can I do with Brushes?"
A: Design, create, explore. Let's say you have a swirl that you want to stamp onto your Christmas card, or photo, or blog banner. You choose blue, but you may want it to be subtle underneath the greeting/photo/text.  So, you create a New Layer, then click/stamp the brush in blue.  You can adjust the Opacity to make it appear like vellum...a soft look. Then, on another New Layer, you'd click/stamp the brush in blue, pink or another color on top of it & you'd have a very interesting look!
This is how I create most of my art.  All the brush work you see in my art is done on separate layers, colors & adjusting the Opacity to make it interesting! 
Q: "How can I make my own brush?" 
A: This is another amazing part of the world of brushes!  You can make a brush out of anything you want! ...a photo you've taken, your signature, a drawing you've made...etc!  This also works for those that use an older version of PS of PSE that is not 'compatible'' with the brushes I sell. ( I create in PSCS3 & so the brush files are only compatible with PSE6+ or PSCS+ as noted above.)
Creating Brushes:
Open your image to create your brush. (photos, PNG, whatever) Go to SELECT>ALL. 
Go to EDIT>DEFINE BRUSH. Name your brush when the box prompts you.  Voila! You've created a brush!  **This doesn’t mean your brush is saved. You may still lose it unless you save it. 
Saving Brushes:
1. Select your Brush Palette. Notice the arrow.
Select the arrow & you will see the drop down menu.
2. Here, you will see where you can Reset, Load, Save, & Replace your brushes.
Hit Save & you’ve saved your brush.
There’s tons more to the world of brushes, but this is a start.
**for a little video tutorial; check out this!

Friday, May 1, 2009

House of 3 Wall aRt questions answered:


We've had lots of questions about our first release of House of 3 House Adornments: NEW JEWELED WALL ARTSo, I thought I'd answer them here:

Q: Do you ship to Australia?
A: Yes! We ship world wide. We wanted everyone all over the globe to have these nifty decor items! enjoy!


Q: Will you carry these again? In another color?
A: We have a limited number in this first Edition. Once they are gone, they are gone. So, act quickly!
**in the future we may have another run, but it won't be the same! You'll only get this Limited Edition of the exclusive House of 3's first designs!...like an artist's limited edition works!
Q: How do I put them up? How do I reposition?
A: In your COOL box, you'll receive a printed out instruction page. (along with a few extra Jewels...just in case.)

They are quite sticky & stick to anything. There are 3 layers.
1st. layer is the back.
2nd. layer is the die cute image.
top layer is a grid sheet.

You simply peel off the back layer, follow the grid lines, press the sticker onto the surface, then peel off the grid sheet to reveal the black wall art image.

Super easy. But, like I said, it's very tacky. The plastic/vinyl is very thick & resilient, so if you don't get it right the first time, you can always peel it off &
reposition.

In these shots I wanted to think 'out of the box' & put them up on a cement wall. After I was finished there was cement on the stickers. I simply washed off with water/soap & they are still sticky...ready for another 'out of the box' place to stick!

On the above image, I've got photos printed on fabric paper, transparencies & photo paper. I took chalk & drew stuff on the cement. Seriously, there are so many options with this.

Q: I love the idea of writing inside the frames. What did you write on the glass & mirror with?
A: Sharpie. Black Sharpie. It comes off with a cotton ball & nail polish remover. Easy. You can also do a Dry Erase marker. Obviously that would come off much easier!


Q: How long will the buy 2 get one free price be offered?
A:We'll end this special Introductory Offer on May 7th. So hurry!

I've loved hearing about your ideas. LOVE!
some other fun ones:

car windows. We were talking about it & how cool would it be on the back of a cute bug...LOL!

lockers: the frames or chandeliers would be cute in a locker...mirrors framed?

light switch: the cute little frames around your light switch? glammed up! love it!

doors: Susan emailed me about a fabulous wood office door she has but doesn't want to put nail marks in it...how cool would these be on that?

laptops: perfect 'laptop skins'...with bling!

weddings: oooo, can you just *see* the possibilities? Every bride wants a glammed up party, right? Wouldn't it be fab to fill a whole room of mirrors with the chandeliers? Or on the refreshment tables, have the lamps on the walls behind? I see them in various heights...perhaps on top cake stands, pedestals, etc.
And of course...photos of the happy couple in the frames? their initials? the wedding date?

Baby Showers/parties: much like the above. Just did a PROM TRANSFORMATION for a friend last weekend. And, the menu shots you see on the home page are from this fun party!

And honestly, for 19.99 & the fact that you can use over & over....like you've all said:
The possibilities are endless!

keep your ideas coming. I'll pick the 3 winners on Monday!
R


Wednesday, February 4, 2009

More questions & answers:::


Thanks so much for all of the great response to House of 3. As with any new site there are a lot of questions & bugs to work out. That's to be expected, right? I'll do my best to answer them & help out.
Q: I see the Enjoy the Process buttons everywhere...what does this have to do with House of 3?
Great question! Firstly, it's simply a way of thinking...of enjoying any aspect of your life...the process of everyday living. Hof3's mantra is also 'enjoy the process.'

Secondly- As many of you know, I had a book that was coming out called Enjoy the Process. Unfortunately, it was cancelled with Autumn Leaves. But...House of 3 is
doing something with the whole concept...so, keep watching!
__________________
Q: ...W
hen I uploaded my damask border page to photobucket it kept reducing it. I even chose the 1mb file and still no go? Then I tried another one I ordered the Chandelier and that one uploaded perfectly? Hmmm.. any suggestions?
Go on over to the Tutorial Section on Hof3 & read the tutorials on how to tweek things for your Blog Couture! The section is set up so you can ask questions (give us specifics) & we can answer them!
______________________
Q: I'm having issues being able to download the 3 products i just purchased. any suggestions?
Email admin@houseof3.com & copy me, too: rhonna@houseof3.com. We are doing everything we can to get everything to work. From the looks of things, there is a small percentage of the downloads that are having problems...most of them are working. But, like I said, we are getting the bugs out & appreciate your patience! We'll do EVERYTHING we can to help! :)
______________________
Q: What did you use to bind the Valentine Book together? I just punched holes with a regular hole punch & added small 7 Gypsies rings to it. Super easy!

______________________
Q: Do you print everything out on
Bazzil Cardstock? Yours looks really sturdy, almost like chipboard. It is pretty sturdy. I printed out everything & either backed it to each other or used Bazzil on most of it. The only exception is the back cover. I wanted this pretty sturdy, so I cut out chipboard & added the black Bazzil on one side & the strips of paper on the other.
______________________
Q: Where do you get those mini manila folders, they are so cute . Guess what? They are just regular file folders, cut down to fit. They are about 6x8. Then the Printables papers are just adhered to some of them. Simple!
_______________________
Q: Love the doily, where did you get it? Wal-Mart. In the wedding section. :)
_______________________
Q: The Free Coupons are cute, but I can't think of what else can I do with them?
No worries! That's why we love to share ideas! Here are some fun things I've done with them. I printed them out on Avery Sticker paper (clear & white) & then created
1. a tin w/ M&Ms;

2. a little box filled with Valentine candy & stuck a white sticker coupon on top.
3. a bag filled with candy; used the clear sticker paper & the Valentines Printable extras on it.ok...I have more, but am running out of time...
keep the questions coming...& I'll do my best to answer!
have a fabulous day!
R

P.s. Crayonmaster, email me, ok?

Tuesday, January 13, 2009

Beginner Bloggers Q & A

When my dds & I first started playing with the backgrounds on Blogspot, we had problems, too. We played around until we got it right.

The key was making sure the code was right. LOL....who'd imagine? And, also, it was key to remember that the background would appear different to everyone, depending on their monitor/screen size.

So, yesterday's Enjoy the pRocess background had some swirls/flowers up on top that may have been cut off on some monitors. Not to worry...I designed it so that it would look like it was 'going off the edges'. So, if you got yours on your blog, show us, k?

I did another one today that doesn't have the top parts of the design....let's see how these work on your blogs! Still the same steps with Photobucket, direct link, etc. But, let's work on these to see if they work, k? I love this kind of stuff...totally fun! So, here's today's fReebie!
Grab it here! (again, 100 downloads & it's gone!)
***ETA: this is the NEW download that will work...the previous one was sized wrong...try this one. I just did it on my blog, following the below instructions & it worked fine! Traci....this is for YOU! *wink*

Ok, let's get these bugs worked out here & have some Q & A time.
_______________________
Q: I had to play with it for awhile to make it work. I have a widescreen monitor, so I'm not sure what it looks like on a normal monitor though. It seems that it really is too small. It was about 1/4 the size of my screen when I started trying to make it work. Ferrill.

A: On my laptop it looks fine, but the flowers on top are coming in from the top...I rather like that. On my desktop (wide screen monitor) it's pushed to the right so the banner & left justification is off. (btw, i love your banner, Ferrill!) Remember, it won't span the entire screen on wide screens, so just go to: LAYOUT>FONTS & COLORS> PAGE BACKGROUND COLOR.
And select black, white or even a blue that is close or coordinating with the blog template.

Q:
I have tried to paste in the new code (with the direct link info from photobucket) and it doesn't work. I only end up with my blog plain white, and stretched right across the screen, with all the usual right hand side stuff, pasted underneath the post. I changed the template to minima too. I will have another attempt later. Jenny.

A: Jenny, it sounds like the code got messed up. Make sure it looks just like this:
body {

background:$bgcolor;background-image:url
(photobucket direct link);background-position: center; background-repeat:no-repeat; background-attachment: fixed;

margin:0; color:$textcolor; font:x-small Georgia Serif; font-size/* */:/**/small; font-size: /**/small; text-align: center;


Make sure there are no extra parentheses, comas, etc. Good luck & come back & tell us how it's going!

Q: ...
wondered if you are going to start doing blog templates that we can purchase?? I am totally interested in a custom Rhonna blog design that nobody else has :) April

A: I would love to! Email me!

Q: I have some very similar pictures from Paris and tried fooling around, but got nothing as nice as yours. I don't have actions in Macromedia Fireworks ... do you know of any way to achieve similar results? Jessica.

A: No, I don't know Macromedia Fireworks. I'm so sorry! That is one reason I love Photoshop; very cool stuff can be done with photos!

Q:
BTW, I see you are on FB, is that for your close friends or if I ask to become a friend will I get in? Nancy W

A: Sure thing...send me an invite & add a message telling me who you are!

_______________
Remember, don't get frustrated the first time you try. Like I said, it took my dds & I several tries! I just have so much fun, & wanted to share!
have a gReat day & enjoy the pRocess!
R

Monday, January 12, 2009

Beginner Bloggers....

Ok, it was fun to hear everyone's comments! I loved hearing about your blog interests! Thanks! I'm excited to share blog stuff!

So without further ado, let's begin our Beginner Blogger Tutorial. :)

Adding Custom Background to Blogspot.(Typepad users, I'm finding out more info on this, hang tight!)

1. Download this blog template fReebie: Enjoy the pRocess.
(first 100 downloads, then it's gone!)2. You’ll need to host this on Photobucket. So, create an account, if you don’t already have one, & go to your
Image Gallery.


Notice the above red star: Make sure the
‘Reduce to’ says ‘1 megabyte file size’. In order for your background to span your screen width, this MUST be selected. (IF you have problems with the size of your 1MB background, you may want to try uploading it as a 2MB background. It may help in the screen viewing.)

3. Click:
Choose Files & upload your RF_EnjoythepRocessfReebie.jpg blog template.
When your blog template is loaded, it will appear as an image in your account.
Click on the box & copy the
Direct Link.4. Now, you’ll apply this to your blog, so log into your blog.

5. Go to: CUSTOMIZE>LAYOUT>PICK A NEW TEMPLATE & choose a
‘Minima Template’.6. Go to: EDIT HTML. Inside your box, you’ll see a bunch of jibberish. *unless you know HTML code! LOL! To they laymen, like myself, it’s jibberish. But, it’s what we need to know to change our blog background.**

so.....Scroll down until you see:


body {
background:$bgcolor;
margin:0; color:$textcolor; font:x-small Georgia Serif; font-size/* */:/**/small; font-size: /**/small; text-align: center;


and simply cut & paste this:


body {

background:$bgcolor;background-image:url(your direct link you just copied);background-position: center; background-repeat:no-repeat; background-attachment: fixed;

margin:0; color:$textcolor; font:x-small Georgia Serif; font-size/* */:/**/small; font-size: /**/small; text-align: center;


Look closely at the section in between the parentheses; this is where you paste your Photobucket Image Direct Link....INSIDE those parentheses.

7. Save your new blog fashion and & view your blog. If you have any problems, just go back into your HTML code & make sure it’s got the link, etc. **I accidentally left out one of the parenthesis & it jacked it all up! So, be careful!*

Let me know how this goes!!! I can't wait to see your new blogs! It sounded like most people knew how to add their own headers/banners. But, if you need help on that, LMK!
have a fab day * enjoy the pRocess!
R

**eta Q & A:
LynetteB asked:
Should we cut out the original "body{, then paste in the script posted here or add it to the original. It's not repeating itself the length of the blog.

Great question! Yes, paste all of the RED up above into your HTML code. Just make sure your DIRECT LINK CODE is inside those parentheses. Make sense? HTH, Tove...don't give up! You can do it! Email me or post your exact questions here, & we'll work on it together until you have it! good luck, guys!

Chris said:
...it worked perfectly except that it isn't wide enough. I assume I would need to widen it in Photobucket but that requires pro($).

This is one thing that totally depends on what size of screen you are looking on. My laptop cuts a lot of the template off since it's smaller. (i.e. the blog template I have no now only shows part of the photo! )
On my desktop, it isn't wide enough, as you said, Chris...so that is why I have chosen a white background color in my blogger account. When it doesn't stretch across the width of your screen you can just apply a coordinating or contrasting color as your background. i.e. with the Enjoy the pRocess template, you could choose a black & it would coordinate! And, then you wouldn't have to pitch in the $$ to make it work!
hth!