Tuesday, January 13, 2009

Beginner Bloggers Q & A

When my dds & I first started playing with the backgrounds on Blogspot, we had problems, too. We played around until we got it right.

The key was making sure the code was right. LOL....who'd imagine? And, also, it was key to remember that the background would appear different to everyone, depending on their monitor/screen size.

So, yesterday's Enjoy the pRocess background had some swirls/flowers up on top that may have been cut off on some monitors. Not to worry...I designed it so that it would look like it was 'going off the edges'. So, if you got yours on your blog, show us, k?

I did another one today that doesn't have the top parts of the design....let's see how these work on your blogs! Still the same steps with Photobucket, direct link, etc. But, let's work on these to see if they work, k? I love this kind of stuff...totally fun! So, here's today's fReebie!
Grab it here! (again, 100 downloads & it's gone!)
***ETA: this is the NEW download that will work...the previous one was sized wrong...try this one. I just did it on my blog, following the below instructions & it worked fine! Traci....this is for YOU! *wink*

Ok, let's get these bugs worked out here & have some Q & A time.
_______________________
Q: I had to play with it for awhile to make it work. I have a widescreen monitor, so I'm not sure what it looks like on a normal monitor though. It seems that it really is too small. It was about 1/4 the size of my screen when I started trying to make it work. Ferrill.

A: On my laptop it looks fine, but the flowers on top are coming in from the top...I rather like that. On my desktop (wide screen monitor) it's pushed to the right so the banner & left justification is off. (btw, i love your banner, Ferrill!) Remember, it won't span the entire screen on wide screens, so just go to: LAYOUT>FONTS & COLORS> PAGE BACKGROUND COLOR.
And select black, white or even a blue that is close or coordinating with the blog template.

Q:
I have tried to paste in the new code (with the direct link info from photobucket) and it doesn't work. I only end up with my blog plain white, and stretched right across the screen, with all the usual right hand side stuff, pasted underneath the post. I changed the template to minima too. I will have another attempt later. Jenny.

A: Jenny, it sounds like the code got messed up. Make sure it looks just like this:
body {

background:$bgcolor;background-image:url
(photobucket direct link);background-position: center; background-repeat:no-repeat; background-attachment: fixed;

margin:0; color:$textcolor; font:x-small Georgia Serif; font-size/* */:/**/small; font-size: /**/small; text-align: center;


Make sure there are no extra parentheses, comas, etc. Good luck & come back & tell us how it's going!

Q: ...
wondered if you are going to start doing blog templates that we can purchase?? I am totally interested in a custom Rhonna blog design that nobody else has :) April

A: I would love to! Email me!

Q: I have some very similar pictures from Paris and tried fooling around, but got nothing as nice as yours. I don't have actions in Macromedia Fireworks ... do you know of any way to achieve similar results? Jessica.

A: No, I don't know Macromedia Fireworks. I'm so sorry! That is one reason I love Photoshop; very cool stuff can be done with photos!

Q:
BTW, I see you are on FB, is that for your close friends or if I ask to become a friend will I get in? Nancy W

A: Sure thing...send me an invite & add a message telling me who you are!

_______________
Remember, don't get frustrated the first time you try. Like I said, it took my dds & I several tries! I just have so much fun, & wanted to share!
have a gReat day & enjoy the pRocess!
R

Monday, January 12, 2009

Beginner Bloggers....

Ok, it was fun to hear everyone's comments! I loved hearing about your blog interests! Thanks! I'm excited to share blog stuff!

So without further ado, let's begin our Beginner Blogger Tutorial. :)

Adding Custom Background to Blogspot.(Typepad users, I'm finding out more info on this, hang tight!)

1. Download this blog template fReebie: Enjoy the pRocess.
(first 100 downloads, then it's gone!)2. You’ll need to host this on Photobucket. So, create an account, if you don’t already have one, & go to your
Image Gallery.


Notice the above red star: Make sure the
‘Reduce to’ says ‘1 megabyte file size’. In order for your background to span your screen width, this MUST be selected. (IF you have problems with the size of your 1MB background, you may want to try uploading it as a 2MB background. It may help in the screen viewing.)

3. Click:
Choose Files & upload your RF_EnjoythepRocessfReebie.jpg blog template.
When your blog template is loaded, it will appear as an image in your account.
Click on the box & copy the
Direct Link.4. Now, you’ll apply this to your blog, so log into your blog.

5. Go to: CUSTOMIZE>LAYOUT>PICK A NEW TEMPLATE & choose a
‘Minima Template’.6. Go to: EDIT HTML. Inside your box, you’ll see a bunch of jibberish. *unless you know HTML code! LOL! To they laymen, like myself, it’s jibberish. But, it’s what we need to know to change our blog background.**

so.....Scroll down until you see:


body {
background:$bgcolor;
margin:0; color:$textcolor; font:x-small Georgia Serif; font-size/* */:/**/small; font-size: /**/small; text-align: center;


and simply cut & paste this:


body {

background:$bgcolor;background-image:url(your direct link you just copied);background-position: center; background-repeat:no-repeat; background-attachment: fixed;

margin:0; color:$textcolor; font:x-small Georgia Serif; font-size/* */:/**/small; font-size: /**/small; text-align: center;


Look closely at the section in between the parentheses; this is where you paste your Photobucket Image Direct Link....INSIDE those parentheses.

7. Save your new blog fashion and & view your blog. If you have any problems, just go back into your HTML code & make sure it’s got the link, etc. **I accidentally left out one of the parenthesis & it jacked it all up! So, be careful!*

Let me know how this goes!!! I can't wait to see your new blogs! It sounded like most people knew how to add their own headers/banners. But, if you need help on that, LMK!
have a fab day * enjoy the pRocess!
R

**eta Q & A:
LynetteB asked:
Should we cut out the original "body{, then paste in the script posted here or add it to the original. It's not repeating itself the length of the blog.

Great question! Yes, paste all of the RED up above into your HTML code. Just make sure your DIRECT LINK CODE is inside those parentheses. Make sense? HTH, Tove...don't give up! You can do it! Email me or post your exact questions here, & we'll work on it together until you have it! good luck, guys!

Chris said:
...it worked perfectly except that it isn't wide enough. I assume I would need to widen it in Photobucket but that requires pro($).

This is one thing that totally depends on what size of screen you are looking on. My laptop cuts a lot of the template off since it's smaller. (i.e. the blog template I have no now only shows part of the photo! )
On my desktop, it isn't wide enough, as you said, Chris...so that is why I have chosen a white background color in my blogger account. When it doesn't stretch across the width of your screen you can just apply a coordinating or contrasting color as your background. i.e. with the Enjoy the pRocess template, you could choose a black & it would coordinate! And, then you wouldn't have to pitch in the $$ to make it work!
hth!

Friday, January 9, 2009

#4....adventuRing into blog design---->


I'm having so much fun with blog design....that is one reason I went back to blogging! I'm one of those people that *loves* fashion...& changing my blog design is like changing my outfit. Some days, I'll have a couple different outfits on; just for fun!

and, so....yes. My blog designs will be changing oh-so-often! LOL! Ya like my new digs?
This new background is created with a photo I took in Paris off of the Eiffel Tower. I wanted it to be textured & funky, so with this photo: (totally windy, cloudy & cold up on that Tower!---not a good photo!)
I applied Jinky's Urban Intensity photo Action along with my Vintage Photo Texture & voila! I got this:

So, putting together a blog background & banner is super fun & it's totally Blog Fashion for me...I love it! Don't be surprised if you come back & it's all different!~

**eta: I've had a lot of questions about how to do this yourself!
Who'd like to learn? raise your hand!!!! Dish..I'd love to hear!
have a fab weekend & enjoy the pRocess!
R

Thursday, January 8, 2009

Join me for Adventure #3....


Up for a cReative adventuRe in this new yeaR? I am...I need & love daily cReating...& the fabulously cReative Emily Falconbridge has started a new creative pRocess via her blog. It's called 52 Questions.

A whole year of questions & answers to use for a cReative jouRney! Love her & the inspiRation she provides!

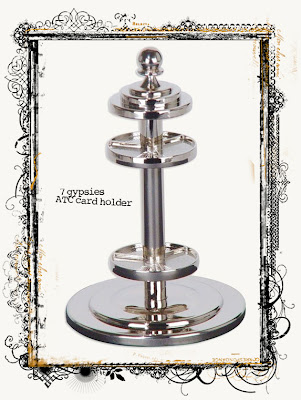
Now, she said we can use whatever we want for these, but to keep them small. So, I've decided to use the 7 Gypsies ATC card holder. I love these! (and 7Gyspsies have so many other cool ATC products you can use with this project!)
I have loved ATCs for a while now...found them on that site & have seen amazing work from artists all over the world...have been involved in many ATC swaps, etc.


So....I decided to go with this size for Emily's creative challenge. She's doing tags & has done playing cards before, so go with whatever you have around & enjoy this cReative pRocess!


Check out how cool Sande Krieger's advent calendar turned out using this spinner! She's a*mazing!
LinkLink
Here is my first week. The question is: What are your wishes for 2009.


I decided that with these little ATC cards, I'd either cReate my weekly challenge right ON them (gesso, paint, stamp, paper, ink, fabric, felt, flowers, jewels, whatever...) OR>>>> I'd design them in Photoshop, print them out on either cardstock or sticker paper & just adhere them to the card & stick in my spinner...I'm excited for all the possibilities of weekly cReating with these questions she'll prompt us with!

I also made this little size into a PNG file so I could just add a Clipping Mask with my photos or whatever & make cards like the one above. And...cuz I love you so much, I'm sharing for anyone who wants one! Again, 100 downloads & it's gone...so hurry! Judging from the previous downloads on here, they are gone w/in a few min. after I put this link up!!!! Go!!!!
HERE!

And, in case you've never used a Clipping Mask...here's a little tutorial in Photoshop CS3.

1. Open your new, free, cool Rhonna Farrer ATC template. (It's in a PNG file, so you'll see grey & white checks on the background. That's OK...it means it's transparent!)

2. Open your photo or digital paper. (Here, I' ve used a photo of a flower.)

3. Go to: FILE>NEW> & create a 300 DPI 2 x 3.5 canvas with a white background.

4. With your Move Tool, drag the RF ATC template onto the background.

5. Go to: LAYER>LAYER STYLE> DROP SHADOW. And apply this drop shadow for depth. This is optional, you don't *have* to, but just play around to see if you like this effect.

6. Drag your photo or paper onto the canvas. It should appear ON TOP of your template.
7. BE SURE YOUR PHOTO LAYER IS SELECTED. (in blue) Go to: LAYER>CLIPPING MASK. Voila! It will have this little arrow on it as it has taken on the shape of the template underneath! If it's not centered how you want, you can click on the photo Layer & move it around with your Move Tool. i.e. I wanted my flower to be off centered, so I moved it until I got a lot of that cool bokeh thing going!

I'm printing this out, adhering to one of the ATC cards & then journaling on the back of it! I'd love links to those that are using this free download **remember, it's for personal use only, please. & then link back here, please.**

And...be sure to share links with us for your 52 Q project!
happy cReating!
R

Wednesday, January 7, 2009

*Uh*hum...adventure #2?


I knew there was electRicity in the air...I could feel it. But, this fast? I feel like I'm on turbo speed & one day after another...how about 1 hour after another...amazing things are happening!

For instance; just opening this blog has led me to many cool people. (that's what I love about the blog world!) and...the other day Gabreial from Vintage Indie contacted me about her awesome site. Ok, now not to sound silly or anything, but I was a little *star struck*. You see, I have adored her site for some time..I love Vintage...I'm a bona fide Vintage junkie! And so, when she asked if I could help her spruce up her site I was deeelighted! *squeal*

Check this out!
I am loving the new*found creative fReedom this past week..I've been cReating like crazy & all. for. fun. Sometimes, I feel like cReatively you have to shake things up. There's nothing worse for cReativity than the same old, same old, ya know? So, 2009 is the year for shakin' up!

And on that note: some of you might have heard, I'm no longer a Garden Girl or designer over at Two peas anymore....lest any *rumors* should start, I wanted to say one thing. I love 2ps. & always will. There just comes a time when you feel like you gotta make some changes...& that's all it is. change. and change is good!

I have loved working with 2ps...they are a*mazing & the whole ride was fabulous! The artists I've worked with have always inspiRed me & working with the whole digital section has been so fun! Thanks, everyone! It's been 4 years & wow...look how digital scrapbooking has just exploded! I love 2ps for that!!!!

I recently created this layout about just enjoying the pRocess....I think change is an important part of that process...life is full of changes & I want to embrace them so I can continue enjoying the pRocess!
R

Tuesday, January 6, 2009

Adventure #1....


so, as I mentioned yesterday....i LOVE the new yeaR and the new adventuRes that come with it...
I'd love for you to check out adventuRe #1: Songbird Avenue.
This is a digital kit...a fabulous collaboration kit with Jan Crowley . Meredith Fenwick, Amy Watt & Janet Phillips....for a chaRity. Celiac Disease Foundation was the choice of my charities & all proceeds go to this organization. You can read a little more about it here.
I love that they would do this...use cReations to help others in need...thank you, Songbird Ave. for making this happen!And, as promised...I took some shots of the soldering S & I did for J& T for Christmas presents! I love the Heidi Swapp jewels on here & of course, I couldn't do this w/o digi kits & Sally's expertise!

And...for all of you that missed yesterday's PDF download...how about that cool negative frame? Just click here to get it...again, first 100 downloads...then, it's gone! **please remember: this is for personal use only; & if you use it, I'd love a link to it & a shout out! Thanks!**
enjoy the pRocess today!
R

Monday, January 5, 2009

Ringin' in the new yeaR!!!!

wow...thank you SO much for helping me spread the word about my new blog! I'm so excited about it! and...as pRomised....a lucky winneR!
so, Genevieve....congRatulations on 209 digital kits!!! woohooo! Please contact me & we'll set it all up!
And to everyone else...I loved hearing about you; yourr ideas, your digital experience (or lack of) and how you like to use my designs! Keep them coming...keep those links coming! I love inspiRation & you are all a*mazing! Thank you!!!!!

So, school is back in session; the decorations are coming down & it's time to ramp it up! I love the new year...love the new possibilities; the reflections on a year past; the new adventures just waiting to happen! So exciting...can you feel it? It's like there's electRicity in the air!

I have so many ideas, so many wishes & so many thoughts for this new yeaR! It can be overwhelming unless I put it down on paper, so I designed this mantra! It's got this great quote:
Choosing a goal and sticking to it changes everything.
Scott Reed


I love this...sticking to it changes everything. Ok, so then, I put dotted lines just wrote all my goals, thoughts, feelings! I printed it out & have it in my studio for motivation; a reminder to be my best & stick to it.

Yow! Are you getting goosebumps? feelin' that electRicity? Are you with me? Good. Here's aLink PDF download. It will only last for the first 100 downloads or 7 days, so be sure to nab it now!
Happy New Year...and be sure to check out one of my fave sites: Vintage Indie for the MMM!
let's enjoy the pRocess!
R