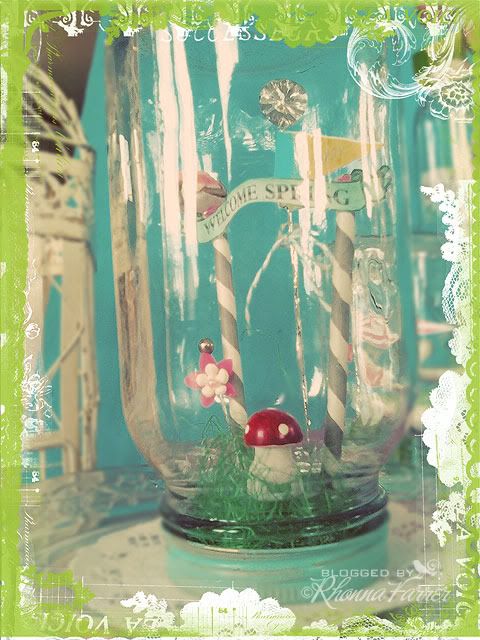
Ok...as promised here are a few little shots of the cute Spring scene jars I've been making to force Spring around here.... The tutorial on how to make these can be found HERE. Just add Spring accessories instead of your snowy scene!
 Supplies to Do-it-Yourself:
mason jar
spray paint:Robin's Egg Blue
easter grass
flowers
mushroom
feather butterfly
ribbon
tulle
pearl strands
printed out House of 3 Brush banners
cupcake stand
grey paper striped straws
Each of these blog photos have been 'dolled' up with the Magical Brushes in the kit we talked about last night on the show & that is now up on House of 3...
so, I'll break it down & tell you what brushes I used on each of these blog images:
TOP IMAGE brush supplies:
green frame: parisian frame bruh sized to go over the photo
white edges underneath: parisian frame edges. just stamped around to give depth.
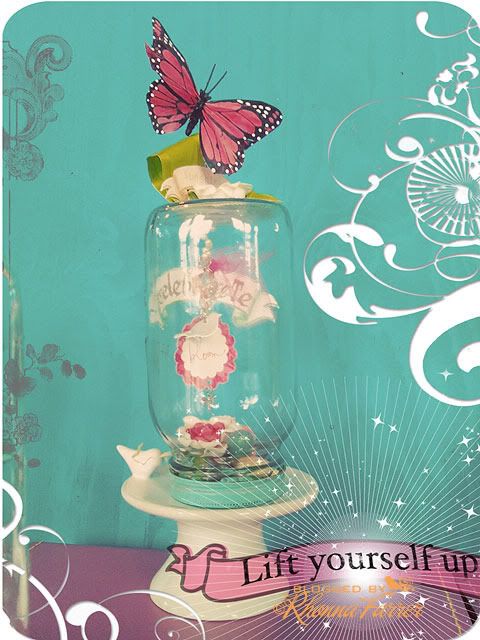
MIDDLE IMAGE brush supplies:
Photo Mat brush is used under the photo & then a Layer Mask is applied. STOP. don't get freaked...this is a bit more advanced, but I wanted to give you these powerful tools in the Magical Brush kit so that WHEN you are ready, you've got them. :) More on those later! *wink*
Grey flowers are part of the Quote art "Lift yourself up" brush...just stamped on edge.
'Lift Yourself up" is part of the quote brush & I just erased the other part for this.
Pink/grey banner is part of the Silhouette Tricks 2 brush kit.
White Sunburst/Magical Bonus brush!
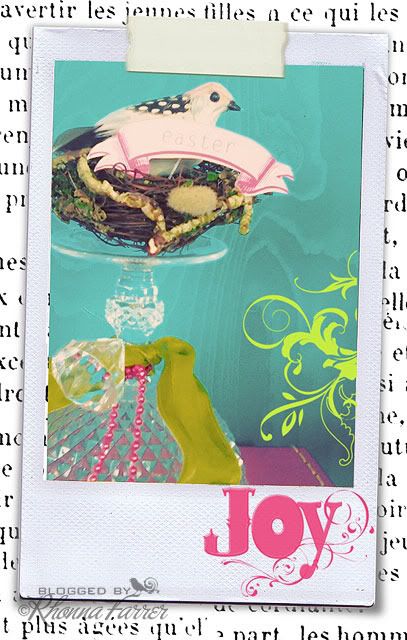 & this image above:
frame: House of 3 Birthday Mini Frames
green swirl: Sassy Swirl brush
pink JOY: Word art brush
background text: Bonus Brush text heart...just stamped large enough to cover bg.
really.
these brushes can make *anything* magical.
(yes, you can do the *magical dance* now!)

these are just sooo fun! And you were fantastic on camera last night loved watching and learing from you!
ReplyDeleteThese are magnificent! I love how you get so excited and energized about these brushes! You are such an inspiration to us all Rhonna, and I so look forward to visiting your blog!
ReplyDeleteYou are so great at posting everything as promised! hugs
ReplyDeleteWhat an awesome craft/idea! Never seen anything like it. Definitely going to try it!
ReplyDeleteI LOVE this! I also wante to buy the brushes set, but I have CS3 - will they still work? I hope so! Thanks!
ReplyDeleteRhonna, your work is so beautiful, being a "pink girl" i do not ususally pay attention to blues, but i am loving that robins egg blue.. i love your jars and i have some of those little mushrooms i have had forever! like prob from the 70's... but they are still in perfect condition.
ReplyDeleteyour brushes are awesome and maybe someday i will get into them more, for right now i have too many projects going to start another, but sure enjoy watching you hof3 girls, you rock!!!
LOVE these cute jars.
ReplyDeleteI have a Question....
After you put your brushes into your program, in this case PhotoShop Elements. Can you create individual folders for brushes. ie: "flowers", "borders", "lace".
I am getting so many brushes I need to get organized with them.
Thank you Debby :) <3
I LOVE the cute jars, and your pictures are all so beautiful. Your work of art are amazing and inspiring as allways. Thank you so much for sharing Rhonna!
ReplyDeletehugs from your Norwegian friend.
Just a quick note to let you know that a link to this post will be placed on CraftCrave.com in the Tutorials category today [23 Mar 10:16am GMT]. Thanks, Maria
ReplyDelete